When you are remodeling a kitchen or bathroom, removing grout found in pre-existing tiles is always one of the hardest parts. Grout is made from sand, cement and water and hardens over some time forming a material that is rock-like. The grout’s strength is the one thing that makes tiles highly desired since it keeps them from shifting. When you learn how you can remove the grout, you will be able to save some money that you would have otherwise paid a contractor.

How to Remove Grout: What to Prepare
Have all the necessary tools
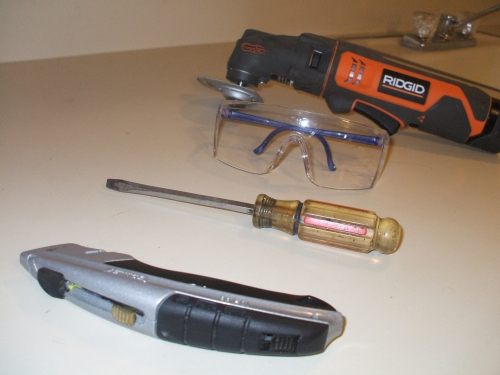
Removal of grout can be done with several tools. The tools you'll use depend on your budget and the amount and type of grout you have. It will also depend on how often you would like to have the grout removed.
Power tools: There are various power tools used to remove grout. They are also called re-grout tools, and they help in the quick removal of grout without using too much effort. These come in handy if there is a large amount of grout or if you want to remove it frequently.
Manual tools: If you find that you are unable to use power tools but still have a large amount of grout to remove, you can always use manual tools. Such a tool normally resembles a diminutive trowel.
If there isn’t too much grout, or if you’re dealing with rubber grout, you can use a standard razor blade like the Exacto knife.
Cover surfaces of appliances
When you are in the process of removing grout, there is bound to be some flying debris which can cause damage. Take a large blanket and drape it over appliances and make sure they have been fully covered. If you just want to have the grout removed and keep the tiles, take a painter’s tape and cover the tile’s edges.
How to Remove Grout: A Combination of Power Tool and Manual Tool
Select a blade that perfectly fits in a reciprocating saw because such blades chip old materials fast. If you are worried about piloting the rotary blade, they come with instructions.
Chuck the grout removal tool into the rotary power tool or reciprocating saw. If you are using the rotary tool attachment, the depth should be at a quarter inch.
Turn the power tool on and slowly push the removal tool to an area that has grout. Carefully guide the tool to prevent marring of the tile.
Make sure that all old material has been removed by working the removal tool in all grout lines.
Use a manual removal tool to chip out any excess grout. The manual tool used to remove grout resembles a screwdriver except for its end. The end has a gouge that is triangular in shape.
Remove all dust and old grout chips from your floor using a vacuum cleaner.
When it comes to tools that could help remove grout, the list is long. Watch the following video to learn clear instructions on using different tools to do this job:
Homemade Grout Cleaner: Manual Tools
Use a grout saw to make a center incision down the middle of each grout line, preferably one with a carbide blade. Do the same with all the grout lines that need to be removed.
Use a a grout scraper to remove the grout from between the pieces of tile, the incision as a starting point. Insert the triangular tip of the grout scraper into the incision that you just made. Apply firm pressure and drag the scraper along the grout line about the length of one tile. Repeat the process until you have removed all the grout in that area.
Here is another video that shows how to remove grout quick and easy with manual tools:
How to Remove Grout: Homemade Grout Cleaner
This homemade cleaner will save you some money. You will need hydrogen peroxide and a water spray bottle. Mix the hydrogen peroxide (half a cup) with water (1 cup). Put the mixture in the spray bottle then go ahead and spray it on the tiles you want to clean. Do not rinse.
While there are some people who prefer bleach instead of hydrogen peroxide, bleach is not only a pollutant but can also turn grout to a yellow color. Regularly spray the mixture on the ties to inhibit grout formation. Vinegar can also have the same effect.
How to Prevent Grout
Apply a penetrating sealer like TileLab grout sealer to make the tiles stain-resistant. The sealer should be resistant to oil and water-based substances. Periodically re-apply the sealer. You can do this annually, but it depends on the wear-and-tear of the surface and the brand as well. The sealer should come with instructions for use.
Wipe off any spill the minute it occurs. Take a cloth, dampen it with clean water and clean the stain to prevent it from setting. If the tiles are in the bathroom, wipe the tiles down using a squeegee after taking a shower. This keeps mold, rust stains, lime deposits and soap scum to a minimum.
- 1.


View All Comments /Add Comment